

Table of contents
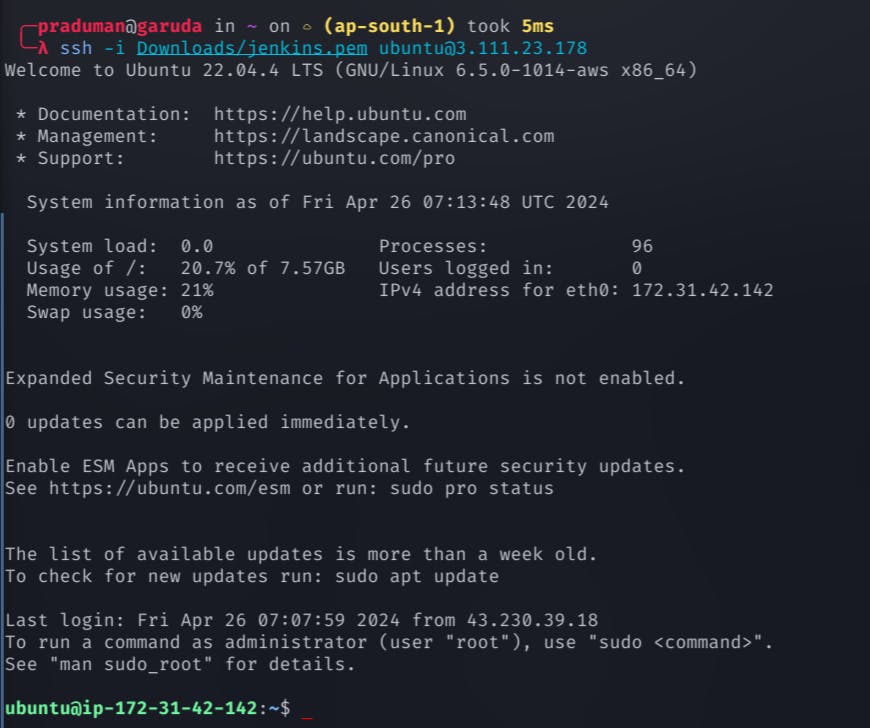
First, you need to Create an EC2 instance and connect it to the local terminal
Java installation
Jenkins is a Java-based application, so you need to have Java installed on your machine before installing Jenkins
To install Java, run the following command:
sudo apt update && upgrade
sudo apt install openjdk-11-jre
To verify the java installed or not:

Jenkins installation
To install Jenkins, run the following command:
sudo wget -O /usr/share/keyrings/jenkins-keyring.asc \
  https://pkg.jenkins.io/debian-stable/jenkins.io-2023.key
echo "deb [signed-by=/usr/share/keyrings/jenkins-keyring.asc]" \
  https://pkg.jenkins.io/debian-stable binary/ | sudo tee \
  /etc/apt/sources.list.d/jenkins.list > /dev/null
sudo apt-get install jenkins
Jenkins has all application running on the port 8080

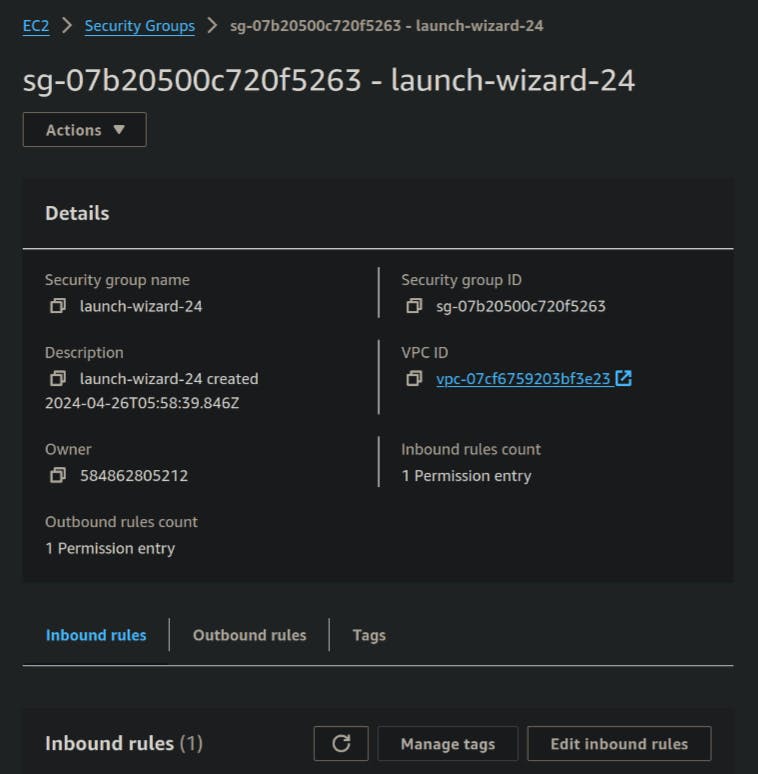
When we talk about EC2, by default, your EC2 instance will not accept traffic from the external world. That is, the inbound traffic rules are blocked by default. So, if you want to access the Jenkins application, follow the below commands.
Open your AWS account and click on the security settings within the instance you are using.

Click on the edit inbound rules
Click on the Add rule button
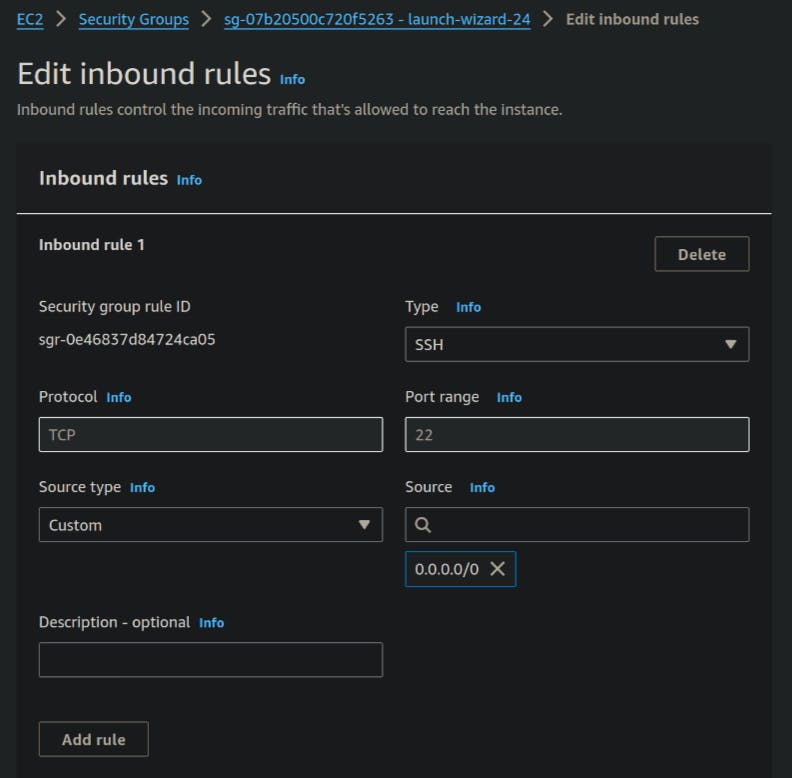
Add the inbound rule and save it

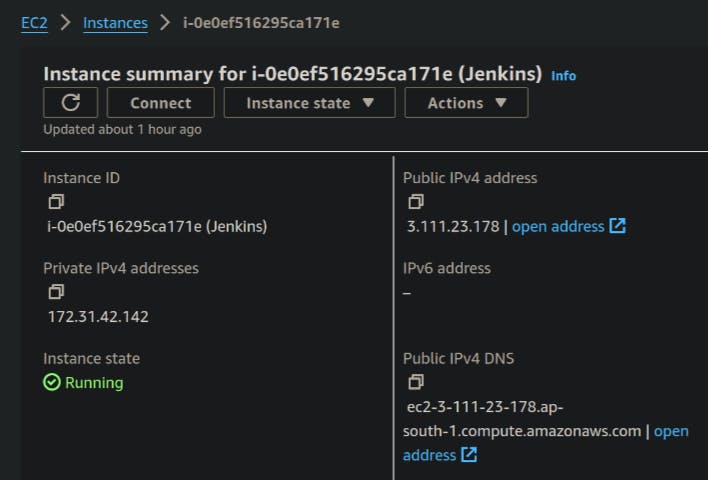
Now, you can access your Jenkins application from anywhere. To do this, navigate to your instance, copy the public ID, and open port 8080 where Jenkins is operational.
Now, go to your terminal and run the command
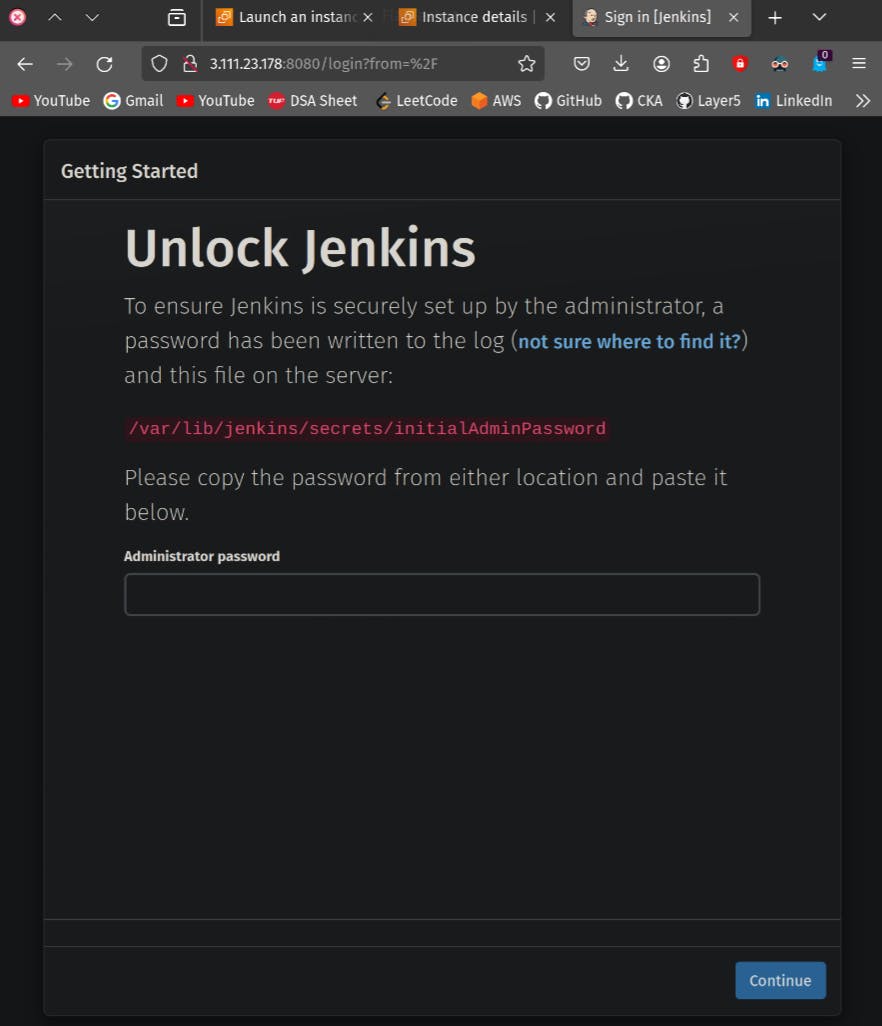
sudo cat /var/lib/jenkins/secrets/initialAdminPassword

Copy the password from here and paste it on the browser in "Administrator password"
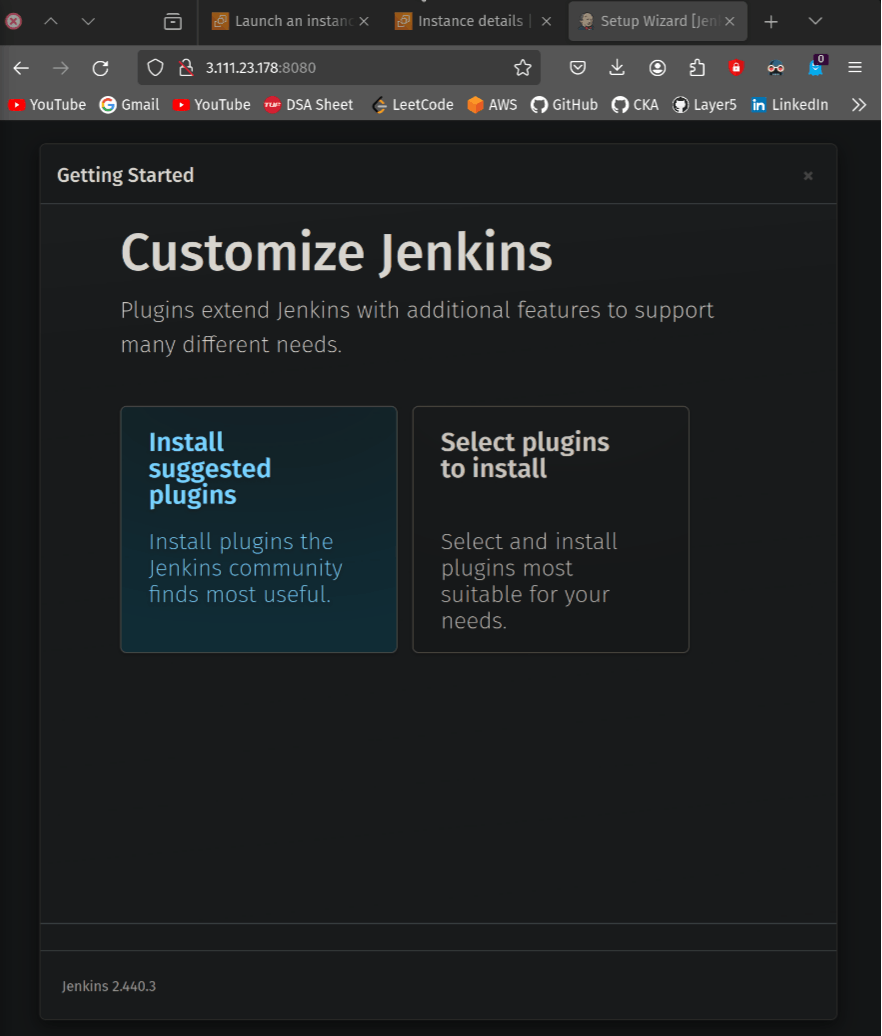
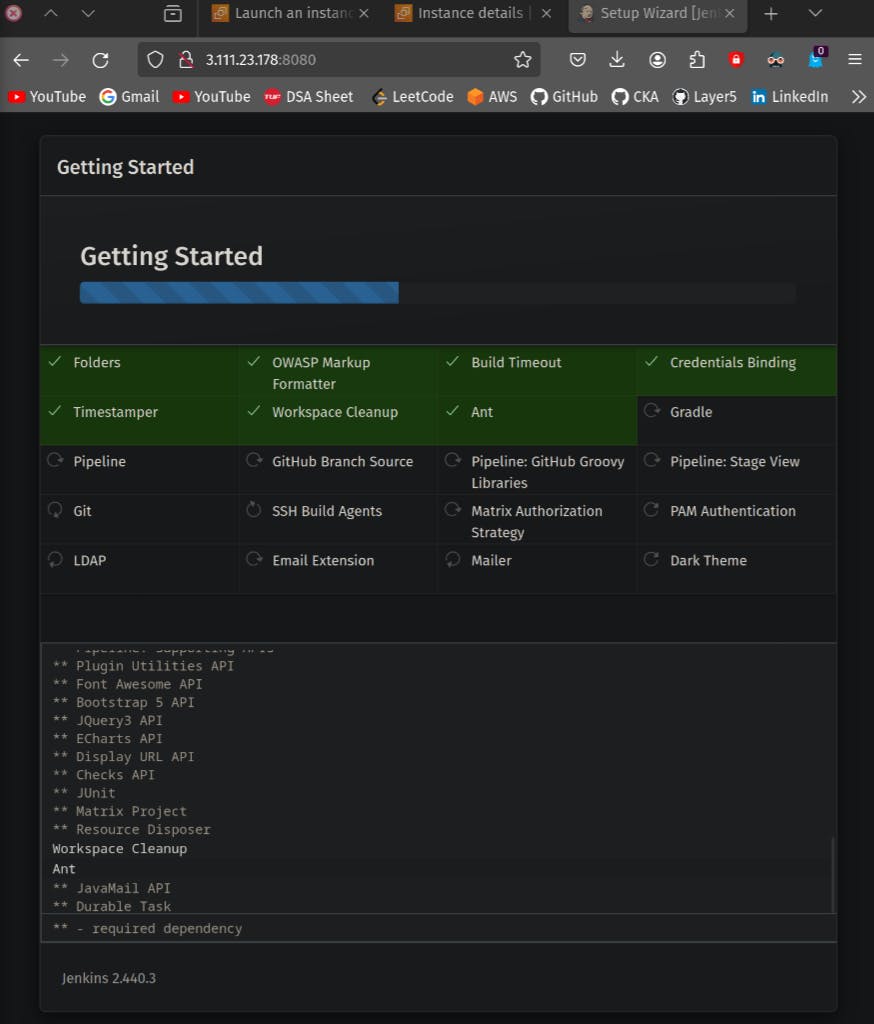
Go with the "install suggested plugins" and at any point of time you can install plugins you want to use in Jenkins
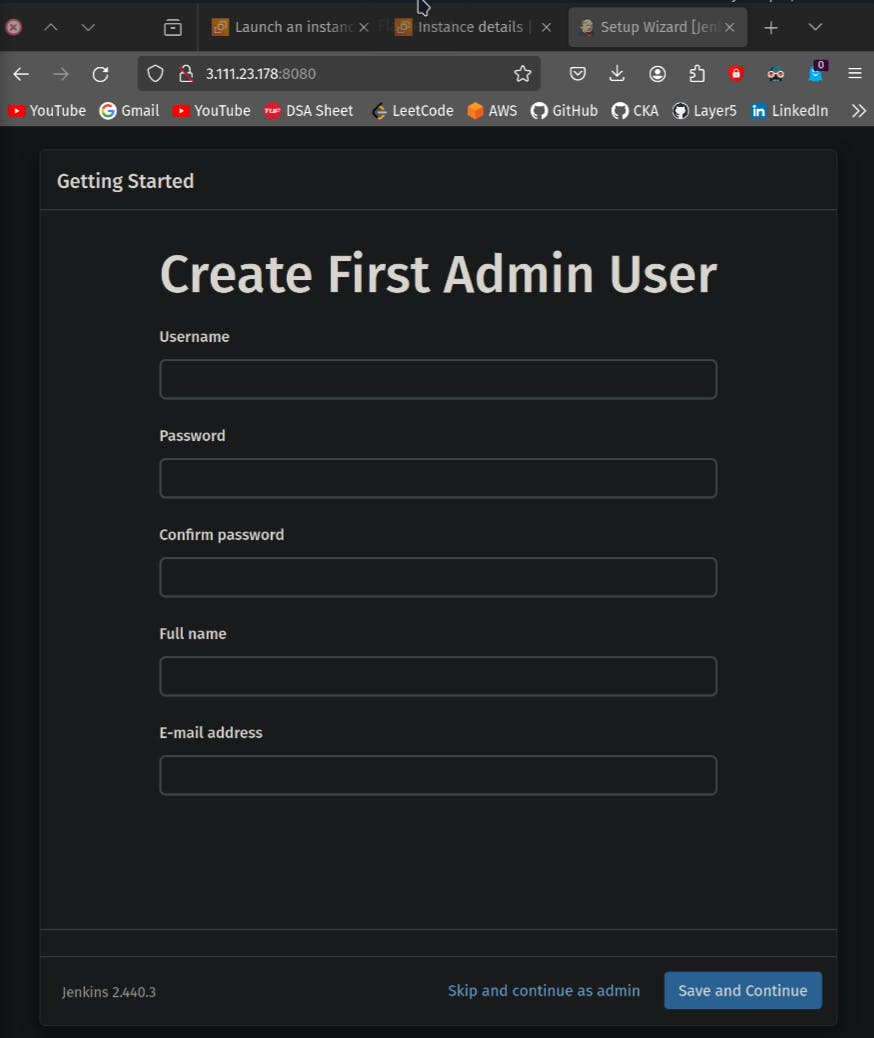
For long-term use, it's highly recommended to configure a username and password for this instance.

Congratulations! Your Jenkins setup is ready, and now you can start working with it.